iPaaS Insights
Integration tutorials, tips and best practices

Creating Your First Integration in Jetic
Apache Camel K is a lightweight, powerful framework for building and deploying cloud-native integrations. The basic functions of an integration involve connecting two or more systems together and performing a specific task. Camel K does so while giving your developers the freedom to run integrations wherever you need them to.
While you can get integrations up and running on Camel K easily enough, we developed the Jetic platform to make things even simpler for your developers. Through Jetic, you can build integrations and deploy them on a Kubernetes cluster of your choosing — granting complete control over not just what your integrations do, but where you can run them.
Below, we'll show you how to create a simple integration in Apache Camel K, then demonstrate it again through the Jetic platform.
Creating An Integration in Camel K
Camel K is a versatile integration framework that can handle a number of different use cases. We'll be creating a simple timer integration in Camel K below. Then, we'll show you the exact same process in Jetic.
Let's get started with Apache Camel K:
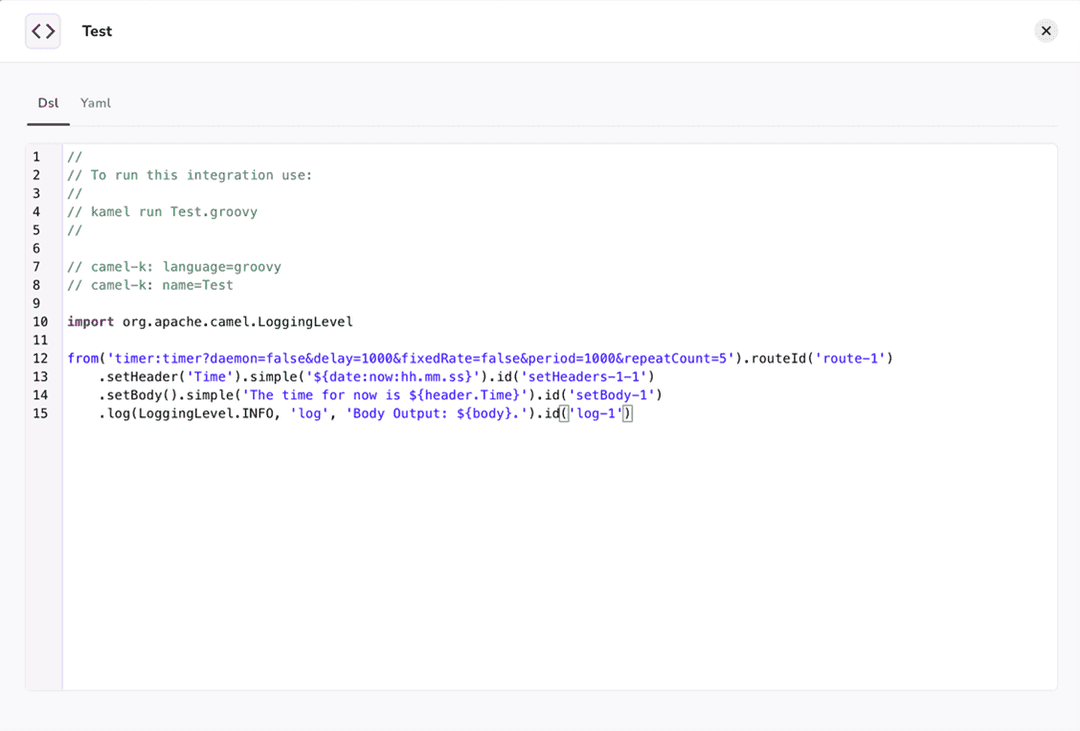
One of the benefits of Camel K is that you can use the Java DSL for a cleaner interface and smaller lines of codes to handle many functionalities. In the example above using Figure 1.1, we use the Camel K script in a groovy file to run our timer integration.
In this example, four Camel K components (from, header, body, and log) are used to test a simple integration. Here's some brief notes on each component:
- From: The from component define the endpoint which is starts the integration. It could be a file, URL endpoint, timer scheduler, etc. In this example, we've set the from component to a timer named
test. This is where you can also set query parameters for your from component based on your needs; for this integration, we've addedrepeatCount = 5to repeat the process five times. - Header: You can assign values to your header to use in your integration. Define values using proper methods, like constant(), simple(), jsonPath(), etc. For our example, we set the header of
Timeto correspond todate:now:hh.mm.ssusing theSimplelanguage. - Body: The body can also be assigned with values using the same method as the header. We've set the body to return a statement:
The time for now is ${header.Time}. - Log: To view a specific output of your routes or sections, you can specify the output using the log component. Above, we've set the log to generate the body content with
Body Output: ${body}..
Now let's generate the output:
To run this integration, simply open a command line and run kamel run <file-name>. Or run kamel run <file-name> --dev to run it in developer mode. (See above in Figure 1.2.)
NOTE: Make sure you've also included the proper Maven dependencies in your project as well.
Creating Camel K Integrations with Jetic
Jetic is a user-friendly integration tool that developers of any skill level can use to create and run Camel K. You can build integrations without writing many lines of code, as the Jetic platform tool will take care of that for you.
Let's walk through the steps needed to run the same sample integration as we did above in the Jetic platform. Your first step is to register and log into the Jetic platform, which you can do be clicking here.
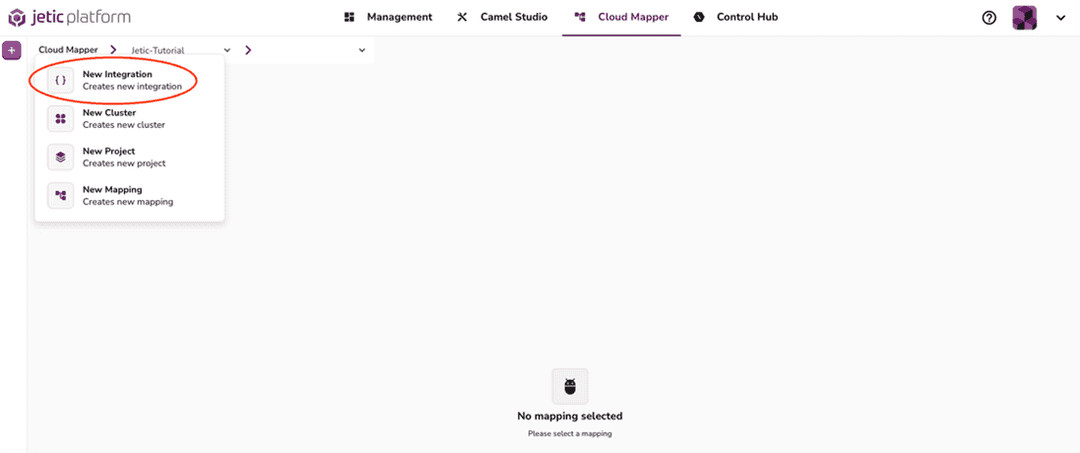
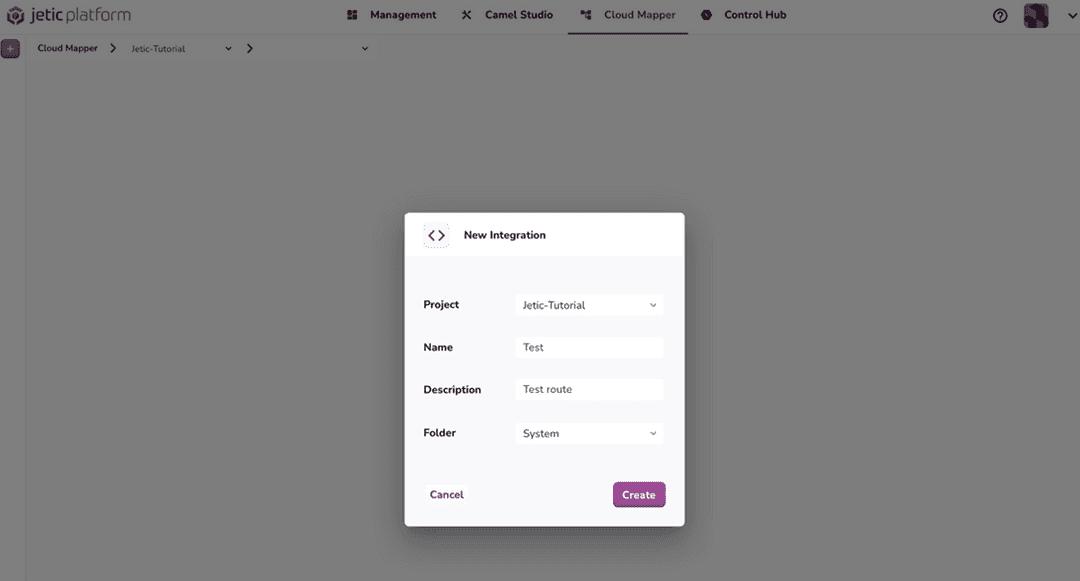
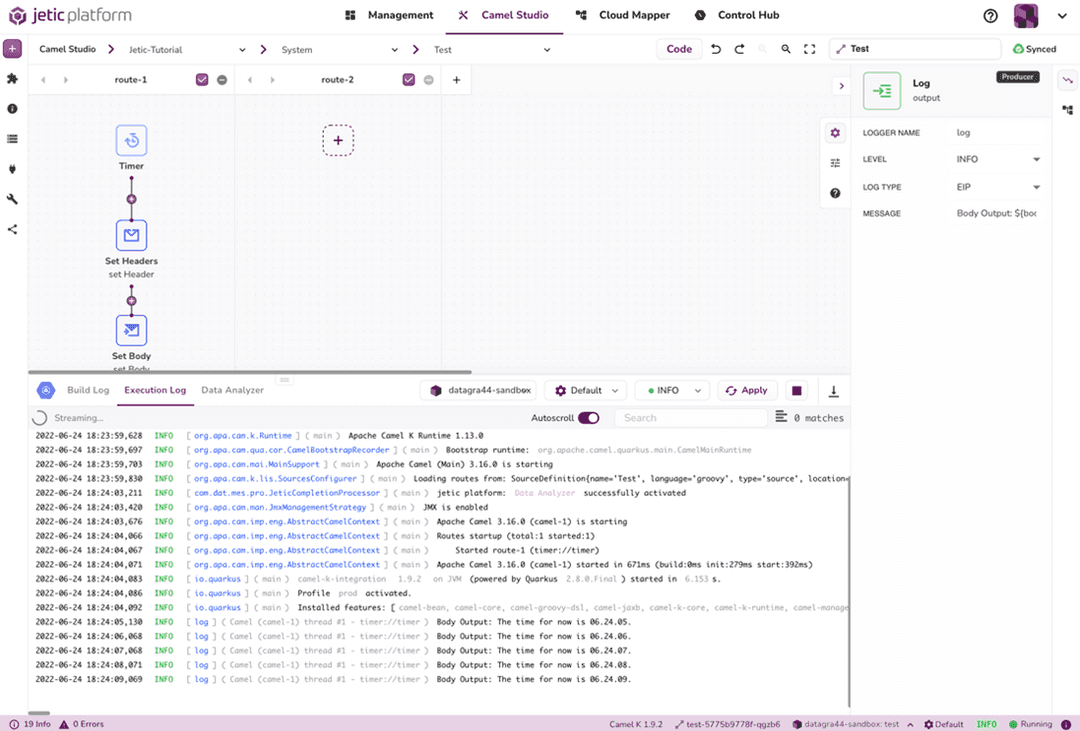
Once you're inside the Jetic platform, it's time to start the integration. Head to the Cloud Mapper section and select the project you want to work with. Click on the purple plus sign at the top-left to create a new integration flie (see Figures 2.1 – 2.2). This will set up a blank route in the Camel Studio tab automatically.
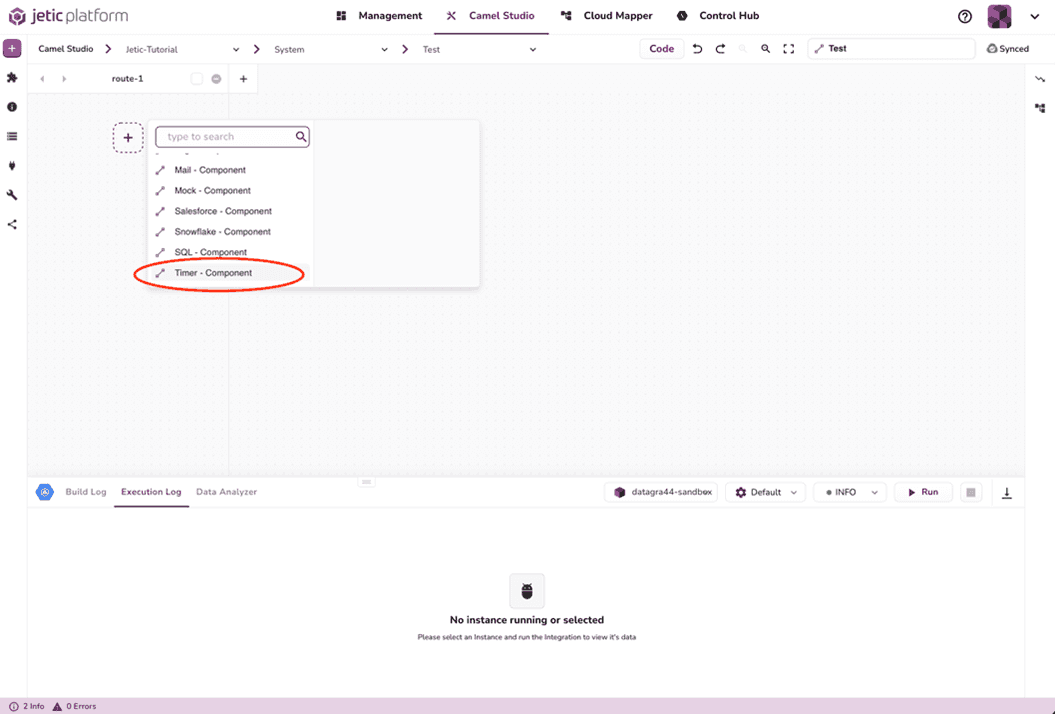
Inside this route, we're going to define the timer function using the same variables as before. Click the dotted plus button add a new component. This will open up a search function to find whatever Camel K function you need. We want to add the Timer component (see Figure 2.3).
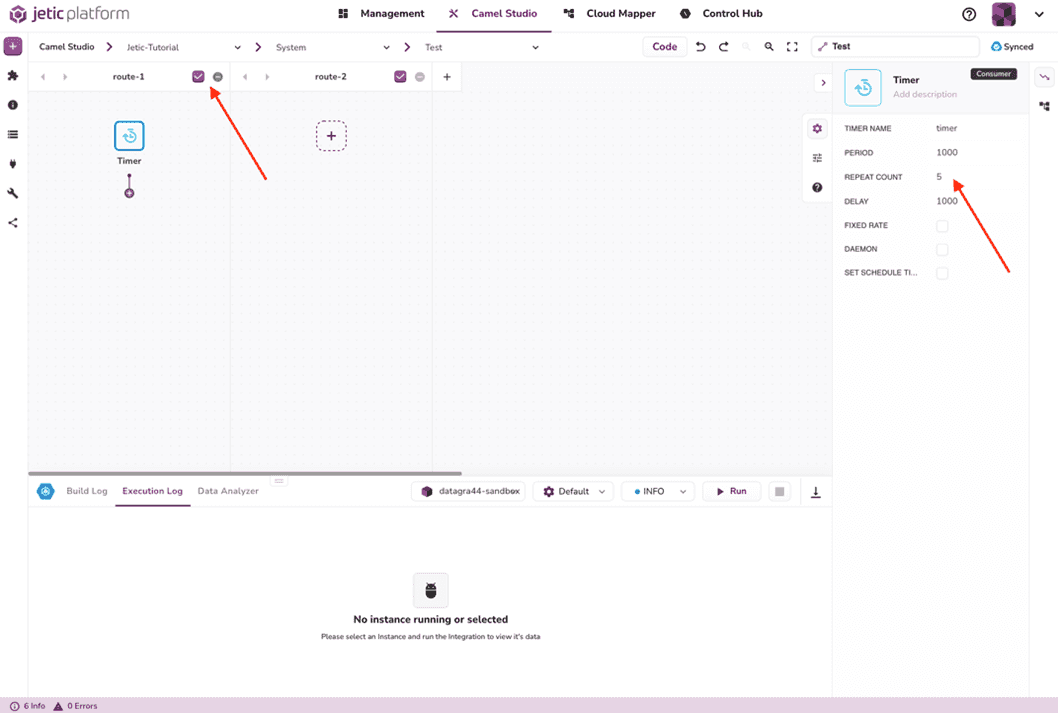
This will add the Timer component to your route. First, ensure that the Enable/Disable Swimlane checkbox is checked. Double-click on the component to change its variables. This is where we set the repeat count to five, as we've done in the previous example (see Figure 2.4).
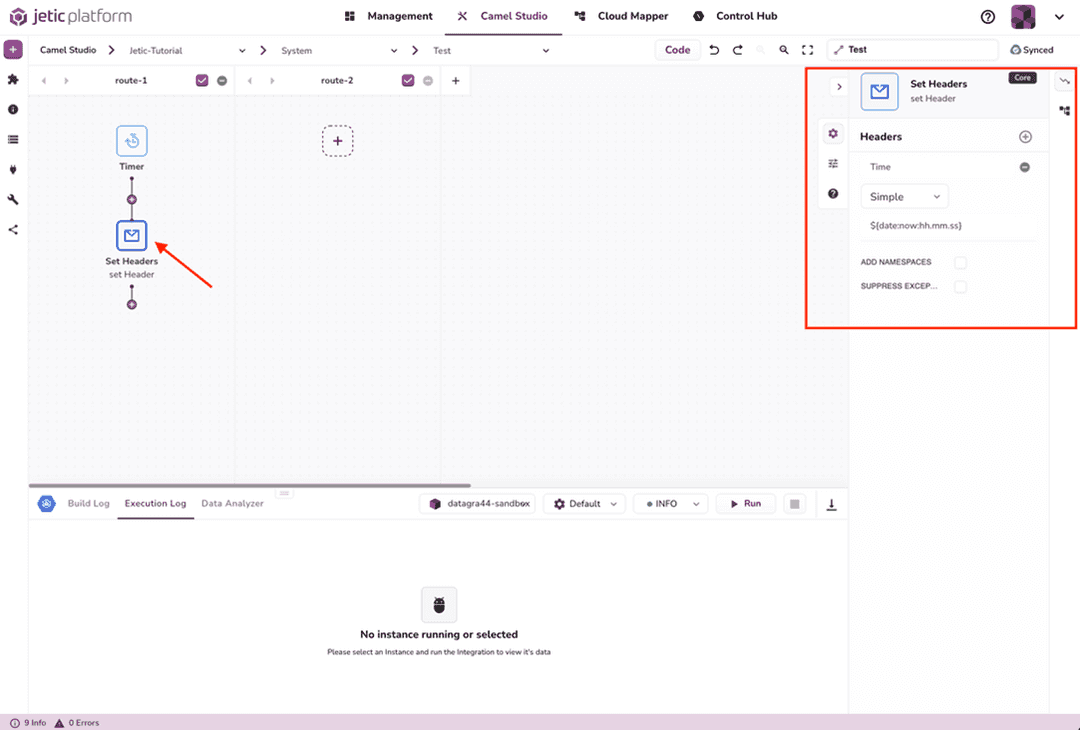
Now let's set the Timer parameters. Add a new Camel component to the route by clicking the purple plus sign beneath your Timer component, and add the Set Headers component. We can then edit this component to add the same Header variables as before (see Figure 2.5). We'll change the Header Name to Time, the Language to Simple, and the Header Value to $(date:now:hh.mm.ss).
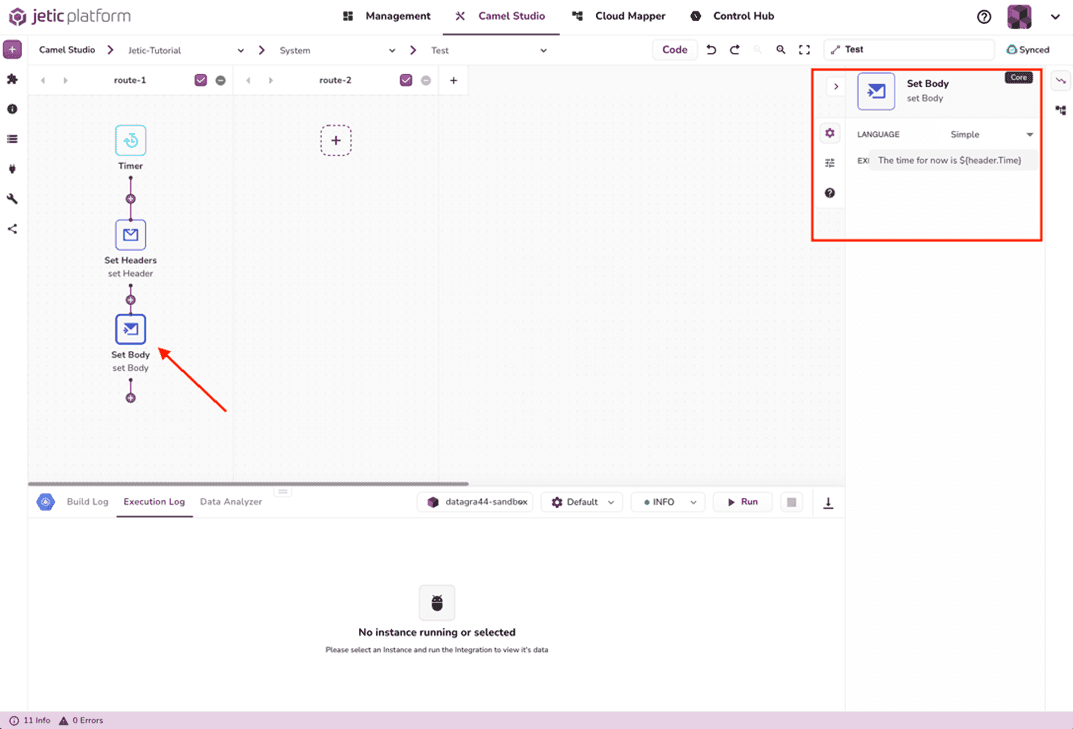
Next, we'll add the Set Body component and configure it the same way (see Figure 2.6). Again, the Language is set to Simple; the Expression will be The time for now is ${header.Time}.
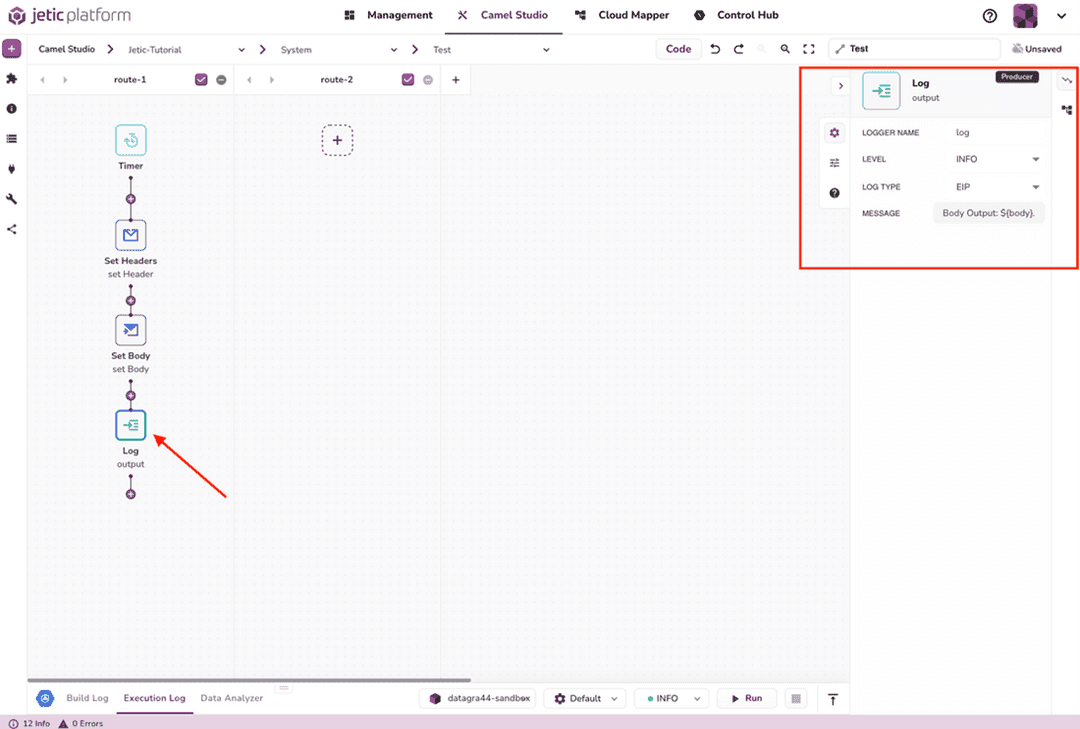
The last thing we need to create is the Log component (see Figure 2.7). We'll keep the Logger Name as log, set Level to Info, and Log Type to EIP. As above, our Message will be Body Output: ${body}..
Finally, we can run our outputs. On the toolbar at the bottom, click the Run button to run your integration. You'll be able to see the generated output in the Execution Log, also accessible in the bottom toolbar (see Figure 2.8).
Your integration is now up and running!
NOTE: Jetic gives you the option to show the content of the code in both Camel DSL and YAML format. If you want to see the code of the Timer integration we've just created, simply select the Code button at the top of the Camel Studio. This will let you view and copy the code of your integration (see Figure 2.9).
Learn More About Camel K
You can view the official documentation for Apache Camel here. We also have a range of resources available if you want to learn more about the Jetic platform. Our documentation page goes over basic set-up and configuration as well as the tool's various features. We also have a blog containing content on Apache Camel which is perfect for those looking to learn more about the integration framework.
