iPaaS Insights
Integration tutorials, tips and best practices
Building REST APIs on Camel with Jetic
REST APIs take advantage of the power of the HTTP protocol to communicate between serverside and clientside services and applications. As stateless APIs, they contain all the information needed to complete the request within the API themselves.
Building these APIs has become the norm for developers, and integration frameworks like Apache Camel provide the tools and resources to make REST API development easy. In just a few steps, you can get a REST API up and running in Camel with minimal coding required.
We built the Jetic platform to help make it easy for developers to build and run integrations and APIs, no matter the intended function. That includes developing REST APIs from initial setup to spinning it out. Let's explore how you can build a REST API on Camel, both standalone and on the Jetic platform.
Building a REST API with Camel
NOTE: This guide will be using Camel's Java DSL. It assumes you have a basic understanding of Camel and Java.
The first step in connecting a REST API to Camel is setting up Camel's REST DSL. This DSL lets Camel designate REST-compatible endpoints as consumers for your routes. It automatically configures your routes and integrations to support REST services, so there's no need for any complicated modification to get it up and running.
As of Apache Camel 3.17, Camel supports Netty HTTP, Jetty, Servlet, and Undertow as bootstraps for REST APIs.
Creating a usable API with Camel is simple and can be done in multiple coding languages. For this example, we’ll be working in Java.
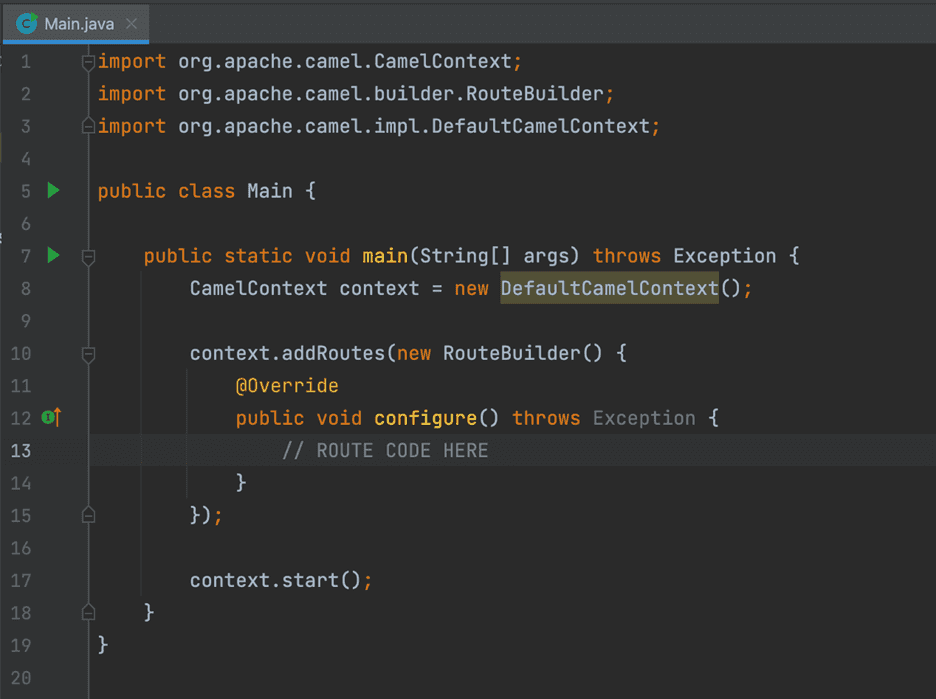
First things first, we need to perform the same Java setup that’s required for all Camel routes (see Figure 1.1). For Java, this is simply a class with a main method and a CamelContext. Within the context, we will define our API and routes.
Figure 1.1
We can define and configure our API within the configure method of our new RouteBuilder using the Rest DSL (see Figure 1.2). Configure the API using the restConfiguration method where both the host and port can be defined. restConfiguration has more options but for this example we’ll just expose localhost and port 8080.
Figure 1.2
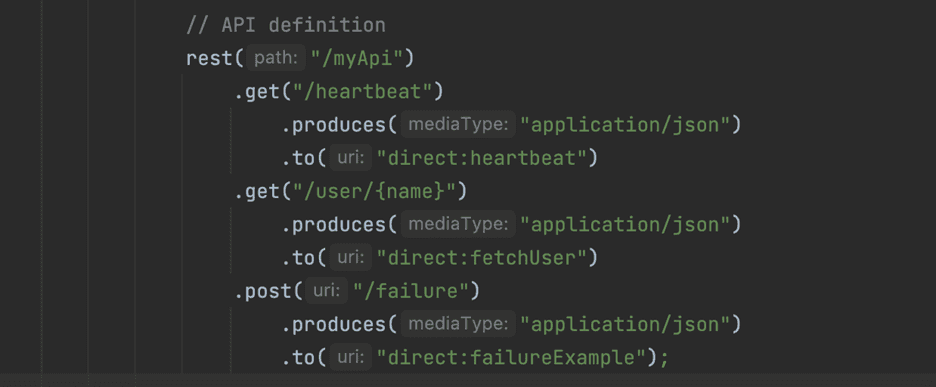
Now we define the API itself using Rest DSL. This example defines an API with a parent path /myApi, and three endpoints which each lead to a unique Camel route (see Figure 1.3):
GET /heartbeat- routes todirect:heartbeatGET /user/{name}- routes todirect:fetchUserPOST /failure- routes todirect:failureExample
NOTE: The GET /user/{name} endpoint actually takes a path variable, name, which Camel automatically adds to the request as a header. For example, if the request GET /myApi/user/Roberto is made to this API endpoint, Camel will automatically add a header called name with the value Roberto. This header can then be used within the route the same as any other header.
Figure 1.3
The API is now defined, so the last part is to add the direct routes that our API will direct our traffic to (see Figure 1.4). These three routes will be called by our API as defined in our Rest DSL, performing the following tasks:
direct:heartbeat- returns the current exchangeIddirect:fetchUser- sets an HTTP response header to return a 404 and returns the name header provided in the requestdirect:failureExample- sets an HTTP response header to return a 500 error response and returns the current exchangeId
Figure 1.4
And that’s it! We can now start the route and observe the logs (see Figure 1.5), showing that the API is ready to use at local host on port 8080.
Figure 5
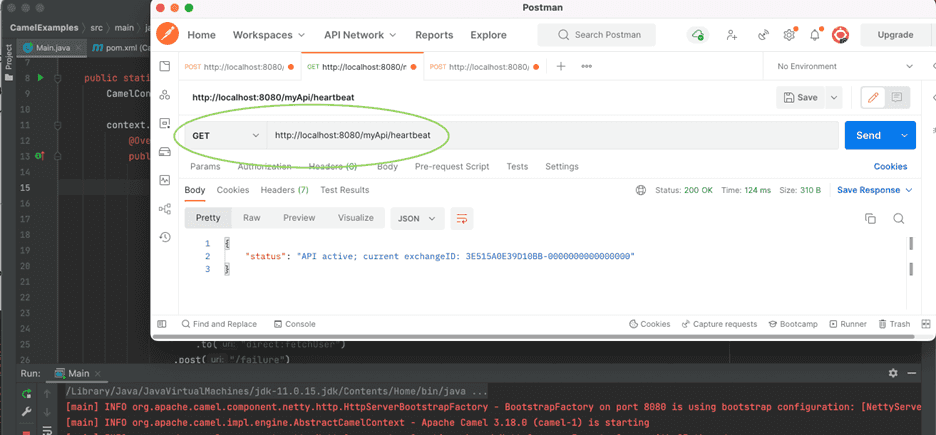
Using an API client like Postman, we can send a request to our heartbeat endpoint and view the response from our API with the command GET http://localhost:8080/myApi/heartbeat (see Figure 1.6).
Figure 1.6


